We put in place for our projects, SharePoint workspaces where we can share documents and collaborate with our client on the progress of their projects.
Among other items, I have created a team calendar mainly to share meetings, travels and vacations plans. Because I also wanted to manage differently those event types, I have created a Category for each of them.
· Meeting
· Holiday
· Travel
· Other
Here is my calendar with some information.

Click on the image to zoom
Because I think that color coding would help to easily identify event categories, I have created the following custom view (note that I have chosen not to display start and end time).

Click on the image to zoom
Here is the procedure to customize your calendar to be color coded.
Step 1: Create a new column [Color]. This will be used to define the color of the cell based on the category.
On the list settings page, click on Create Colum link. Name the new column “Color”, and set the type of information as Calculated (calculation based on other columns).
The formula is the following:
Finally, set The data type returned from this formula is: to Single line of text. =IF([Category]="","LightCyan",IF([Category]="Meeting","DodgerBlue",IF([Category]="Holiday","Tomato",IF([Category]="Travel","LawnGreen",IF([Category]="Other","DarkBlue","")))))
The result of this column will be a color name based on a category. Note that category should reflect ones you choose and color names can be changed.
Step 2: Create a new column [EventText]. This will contains the html code that will display the event text on the calendar view (including the color scheme).
As above, create a new calculated column with the following formula:
="<span style='position:relative;display:inline-block;width:100%;'><span style='width:100%;display:inline-block;text-align:center;border:1px solid "&[Color]&";position:absolute;color:"&[Color]&";'>"&[Title]&"</span><span style='display:inline-block;width: 100%;background-color:"&[Color]&";text-align:center;border:1px solid;z-index:-1;filter:alpha(opacity=20);opacity:0.2;'>"&[Title]&"</span></span>"
Note that we used the previously calculated column [Color] to define the cell color, and we also use column [Title] to display the event title inside the cell (you can also display Start Time and End Time if requested).
This is up to you to define your own style, this is simply html syntax.
This is up to you to define your own style, this is simply html syntax.
Step 3: Define [EventText] column as the display on the calendar view.
You now need to create a new view for this calendar. This new view should be a Standard Calendar format view. Define properties as you wish. The important part is to display our newly created column [EventText] to replace the default Title.

Click on the image to zoom


Let’s now save the view and check the result.

Click on the image to zoom
Not so good isn’t itL. It displays the html code instead of interpreting it. To solve this, we need to insert JavaScript code into the page.
Here is the JavaScript code (such kind of code can be found in MSDN web site or in some blogs like techtrainingnotes.blogspot.com).
// Color coded calendars for SharePoint 2010
<script>
// TechTrainingNotes.blogspot.com// load our function to the delayed load list_spBodyOnLoadFunctionNames.push('colorCalendarEventLinkIntercept');// hook into the existing SharePoint calendar load functionfunction colorCalendarEventLinkIntercept(){if (SP.UI.ApplicationPages.CalendarNotify.$4a){var OldCalendarNotify =SP.UI.ApplicationPages.CalendarNotify.$4a;SP.UI.ApplicationPages.CalendarNotify.$4a = function (){OldCalendarNotify();colorCalendarEventLinks();}}if (SP.UI.ApplicationPages.CalendarNotify.$4b){var OldCalendarNotify =SP.UI.ApplicationPages.CalendarNotify.$4b;SP.UI.ApplicationPages.CalendarNotify.$4b = function (){OldCalendarNotify();colorCalendarEventLinks();}}// future service pack change may go here!// if (SP.UI.ApplicationPages.CalendarNotify.???)}// hide the hyperlinksfunction colorCalendarEventLinks(){// find all DIVsvar divs = document.getElementsByTagName("DIV");for (var i=0;i<divs.length;i++){// find calendar item DIVsif (divs[i].className.toLowerCase()=="ms-acal-item"){divs[i].innerHTML = divs[i].innerHTML.replace(/</g,'<').replace(/>/g,'>');}// find "x more items" links and re-remove links on Expand/Contractif (divs[i].className.toLowerCase()=="ms-acal-ctrlitem"){var links = divs[i].getElementsByTagName("A");if (links.length==1){links[0].href="javascript:colorCalendarEventLinks();void(0);"}}}}</script>
To include the code into the page, there are 2 solutions:On SharePoint Designer, open your SharePoint site. On the left menu, select Lists and Libraries, then click on your Calendar name on the main screen. Right Click on the view you want to color code (or create a new one first) and select Edit File in Advanced Mode.
· Using SharePoint Designer, the JavaScript code will be added to the page code directly
· Using Content Editor Web Part, the JavaScript code is embed in a WebPart.
Using SharePoint Designer
Identify the section below to copy your JavaScript code inside

Save and check the result.

Click on the image to zoom
You can choose to leave items like this or modify CSS styles to remove the green box around your events.
Search the section <style type="text/css"> and replace with this:
<style type="text/css">.ms-acal-time {display:none;}.ms-acal-selected, .ms-acal-item {background:none;border:0px;}.ms-acal-sdiv span {
margin-left:-47px;
}
.ms-acal-sdiv div.ms-acal-title span {
margin-left:0px;
}
</style>
Save and check the result. Now we have the expected result J.
Using Content Editor Web Part
First of all, the script above should be saved into a txt document and uploaded in one of your site library.
Click on the image to zoom
On your custom Calendar View, select Edit page on the Site Actions menu.
Add a Content Editor Web part to Main section; this web part is located under Media and Content category. Edit the web part. Set ContentLink to your script document’s URL and Chrome type to None (this will remove web part title and borders)
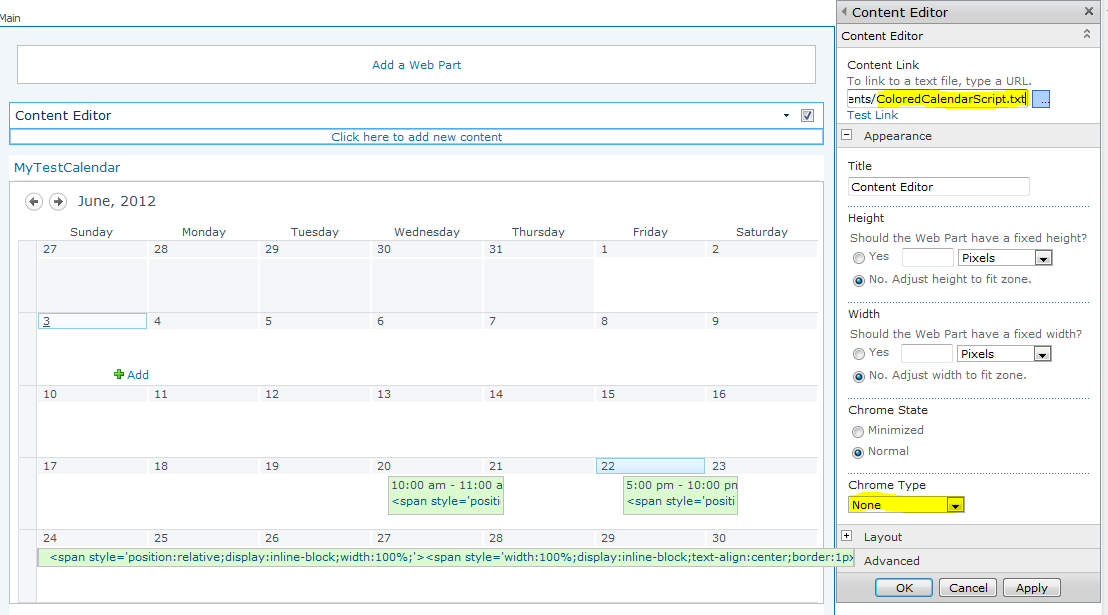
Click on the image to zoom
Save and check the result.
Super appu....
ReplyDeleteTHANKS FOR THE ARTICLE.
ReplyDeleteBUT THE ISSUE IS THAT, EVEN AFTER , ADDING THE ABOVE CODE, am getting the span tag and all the other hrml css elements when i mouse over the event in the calendar. can you pls help how to hide that eventtext being highlighted when we mouse over?