Search This Blog

Tuesday, February 19, 2013

How to Create Charts in SharePoint 2010


Charts are one of the one of most common things to do while working with SharePointSharePoint 2010 makes creating charts easy. With the SharePoint 2010 Chart Web Part, you can create charts with no coding at all. Now, let us take a look at how to create a chart in SharePoint 2010.
1. Create a SharePoint Custom List and name it “Salary.”
2. Add three custom columns named “Gross,” “Housing fund” and “Medicare Tax.” Each of these three columns types should be “Single line of text.”
3. Add several items to the list.
4. Create a new SharePoint Page by clicking “Site Actions ->New Page.”
5. Name the page “Salary charts.”
6. Now click on the “Site Actions ->Edit Page” and from the “Editing Tools->Insert” Group on the ribbon select “Web Part.”
7. From the categories pane select “List and Libraries” and click on the “Salary” List and finally click the “Add” button.
8. Repeat Step 6-7, but add “Chart Web Part” under the “Business Data” Categories.
9. Finally click “Save & Close” to save this configuration for the page.
10. You should now have a “Chart Web Part” under the “Salary List Web Part.”
11. Bind the Chart Web Part to the input source, which in this case is the “Salary” web part.
12. Click on “Data & Appearance” from the “Chart Web Part.”
13. From the first page of the wizard select “Connect Chart To Data,” as show in the figure below.
14. Select “Connect to another Web Part” and click the “Next” button, as show in figure below.
15. Select the “Salary” web part from the List drop down and click the “Next” button.
16. Click the “Next” button.
17. From the “Y Field” drop-down select “Gross” and from the “X Field” drop-down select “Title.” These are the column from the Salary web part.
18. Click the “Finish” button and it should generate a chart like the figure below.
19. Let’s add some quick formatting to make the Chart more visually appealing.
20. Click on “Data & Appearance” and click “Customize Your Chart.”
21. On the “Select Chart Type” step, select “3D Chart Types from the “Chart Templates” and select “Column with Perspective.”
22. Click the “Finish” button and this will generate a 3D chart.
As you see, adding and working with charts in SharePoint 2010 is extremely easy.

Thursday, February 14, 2013

Auto-Numbering InfoPath Forms

Refer this Link
------------------
http://claytoncobb.wordpress.com/2009/06/15/auto-numbering-infopath-forms/

Rich Text Box Controls in Browser-Enabled InfoPath Forms

Over the years of developing InfoPath forms, I have become aware of many idiosyncrasies of browser-enabled forms. I usually find myself trying to find workarounds for designs that are simple in a client based InfoPath form but fall apart in browser-enabled forms. In this post, I present a workaround for using rich text boxes in browser-enabled InfoPath forms.

In the last project I worked on, I had an InfoPath form which required several text boxes to be on a page (as many as 24). The original design of this form had each of these text boxes in the form as rich text boxes. Most of these rich text boxes had data validation rules as well as conditional formatting. I wasn’t breaking any of the rules for making the form browser-enabled and the form worked great in preview mode. Everything was fine until I began using the form in the browser.

Some of the behavior in the browser included:

  • The toolbar for the rich text box hides the label for the rich text box.
  • The toolbar for the rich text box wouldn’t always disappear (even when focus was moved from the textbox). But a teammate discovered that if you click in the upper right corner of the toolbar, it will close out the toolbar.

  • Moving focus from a rich text box causes a postback to the server (because of the validation and conditional formatting) and doesn’t always return focus to the appropriate control on the page. This may leave the user in a different section of the form and cause confusion for the user.
  • Validation for a rich text box does not always work.
  • With this validation rule, if the user enters text into a rich text box and then deletes the text, once focus has moved from the rich text box control, the form does not show an error for the control. This happens because the markup HTML for the control still contains <div></div>, making the XML node for the rich text box control not blank. Therefore, a user is able to complete the form without filling out a required field. The attempted workaround was to set the validation to require a minimum of 20 characters. (This works, but it’s not quite elegant).

With all these things added up, the performance and usability of the form decreased significantly enough to require some sort of workaround. It turned out that there was no real need to include rich text boxes because the users most likely would not take advantage of the formatting provided in the toolbar. The biggest sacrifice was that a rich text box’s height would expand to show all the content within the control whereas a regular text box has a set height. Since the customer was willing to live with this sacrifice, the rich text boxes were changed to regular text boxes with a set height (about 100px to indicate the text box required a lengthy answer). The standard data validation rules work just fine for a text box (if field1 is blank, then “This field is required”). This simple change improved performance and usability tremendously.

This form also had a read-only version. In this read-only version, expression boxes were used to display the data from these text boxes. An expression box will expand to show all content in a field. The expression boxes were even modified to look like a text box (modify the Borders and Shading to change the outline and the background to be white); even with gray text to indicate the control is read-only.

Each InfoPath project seems to provide a new opportunity for imaginative workarounds. In this specific case, the increased number of rich text boxes on a single page is what affected performance and usability. It’s not that rich text boxes shouldn’t be used in browser-enabled InfoPath forms, it’s just that they should be used sparingly and deliberately.

Happy InfoPath form designing!

Monday, February 11, 2013

Custom WCF Services Hosted in IIS

Walkthrough on creating WCF 4.0 Service and Hosting in IIS 7.5

Objective

This article will give step by step walkthrough

1. How to create a basic WCF 4.0 Service?

2. How to host WCF Service in IIS 7.5?

3. Hot to test service in a client.

Create WCF Service

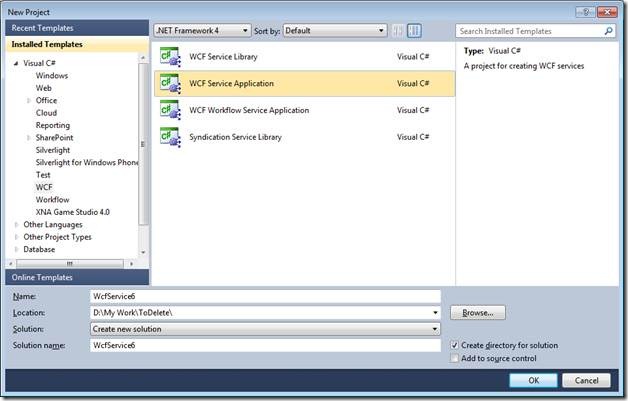
Create WCF service. Open visual studio select new project and then from WCF tab select WCF Service application to create a new WCF service.
clip_image002

Delete the default code created by WCF from IService1 and Service1.svc.cs

a. So delete the data contract

b. Modify the service contract as below. Just make one operation contract to return a string .

IService1.cs

using System;
using System.Collections.Generic;
using System.Linq;
using System.Runtime.Serialization;
using System.ServiceModel;
using System.ServiceModel.Web;
using System.Text;
namespace WcfService5
{
    [ServiceContract]
    public interface IService1
    {
        [OperationContract]
        string GetMessage();
 
    }   
}
 

Service1.svc.cs

using System;
using System.Collections.Generic;
using System.Linq;
using System.Runtime.Serialization;
using System.ServiceModel;
using System.ServiceModel.Web;
using System.Text;
 
namespace WcfService5
{
    public class Service1 : IService1
    {
        public string GetMessage()
        {
            return "Hello From WCF Service "; 
        }
    }
}
 

Leave the default configuration created by WCF.

Web.Config

<?xml version="1.0"?>
<configuration>
  <system.web>
    <compilation debug="true" targetFramework="4.0" />
  </system.web>
  <system.serviceModel>
    <behaviors>
      <serviceBehaviors>
        <behavior>         
          <serviceMetadata httpGetEnabled="true"/>         
          <serviceDebug includeExceptionDetailInFaults="false"/>
        </behavior>
      </serviceBehaviors>
    </behaviors>
    <serviceHostingEnvironment multipleSiteBindingsEnabled="true" />
  </system.serviceModel>
 <system.webServer>
    <modules runAllManagedModulesForAllRequests="true"/>
  </system.webServer
</configuration>
 

Host WCF Service in IIS 4.0

Open IIS

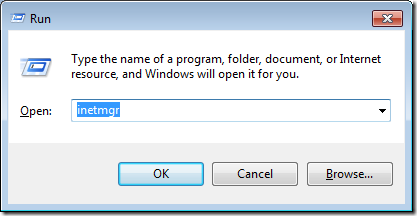
a. Open the command prompt in administrator mode. To do click on Start button then type RUN in search and then in Run window type inetmgr to open IIS .
clip_image003

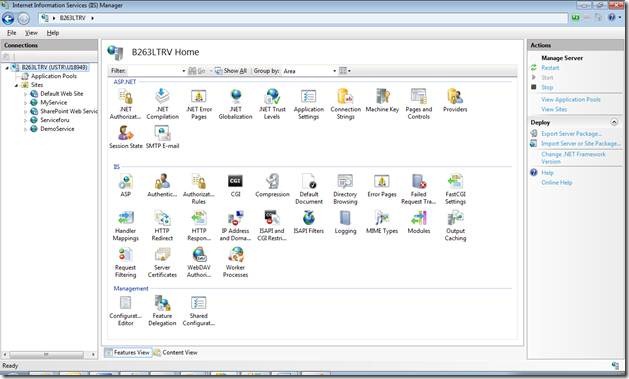
Now you will have IIS open like below
clip_image005

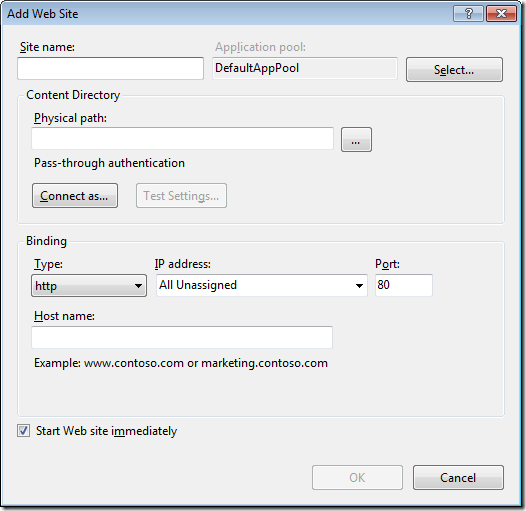
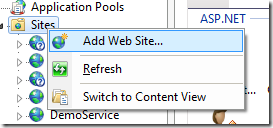
b. Right click on Sites and then click Add Web Site
clip_image006

c. Now a window will open.

clip_image007

Give any name of your choice as the site name. I am giving name here HostedWcfService

clip_image008

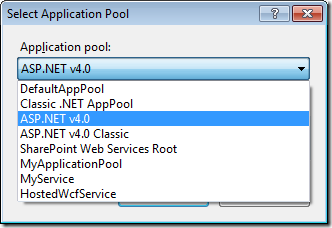
Now click on select and choose ASP.Net v4.0 from the drop down.
clip_image009

Now in the physical path section, we need to give physical path of the service. So to get the physical path of the service, right click on the WCF Service project in visual studio and click open project in windows explorer. Open the project in windows explorer and from address bar copy the path and paste that below. Or you can browse also. Just click on browse button and navigate to project folder of the WCF Service.

clip_image010

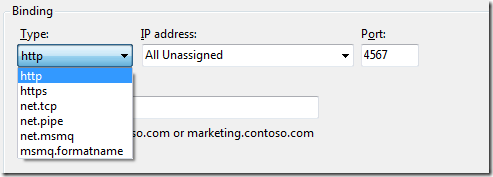
Now at the Binding section select HTTP. Give any port number. I am selecting the port as 4567
clip_image011

Do not give any name as host name. Leave it blank

clip_image012

Check the check box Start Web Site Immediately.

clip_image013

And now click OK on the window.

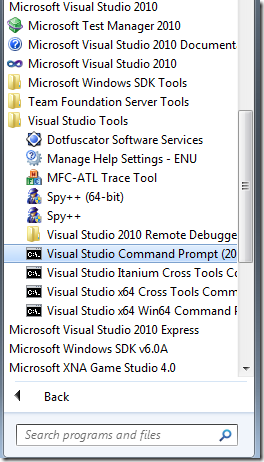
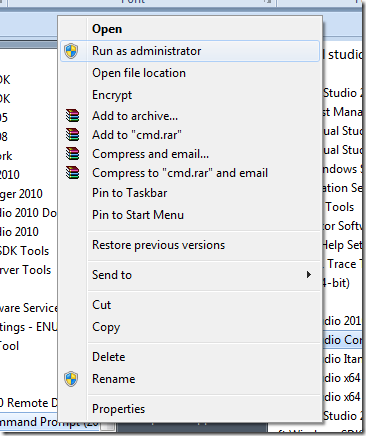
d. Now open visual studio command prompt in administrator mode. Right click and select as administrator
clip_image014

clip_image015

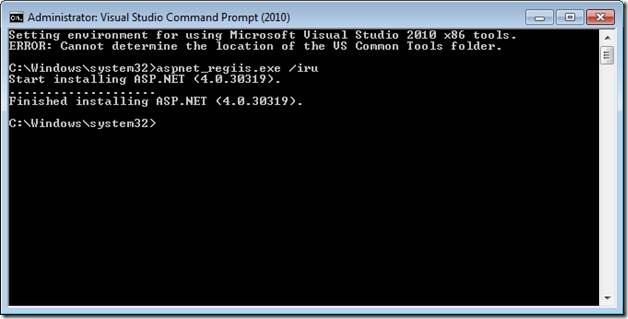
Type the below command

aspnet_regiis.exe /iru
clip_image017

You will get the message Finished Installing ASP.Net 4.0

e. Now go to inetmgr, you would able to see the site you just created in previous step.
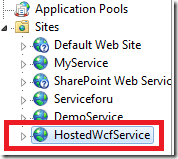
clip_image018

Publishing the WCF Service

Go back to WCF Service. Right click and select Publish
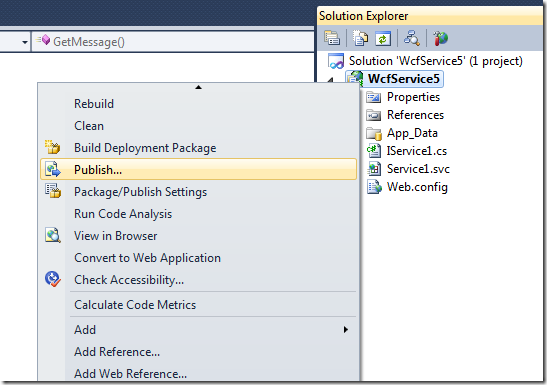
clip_image019

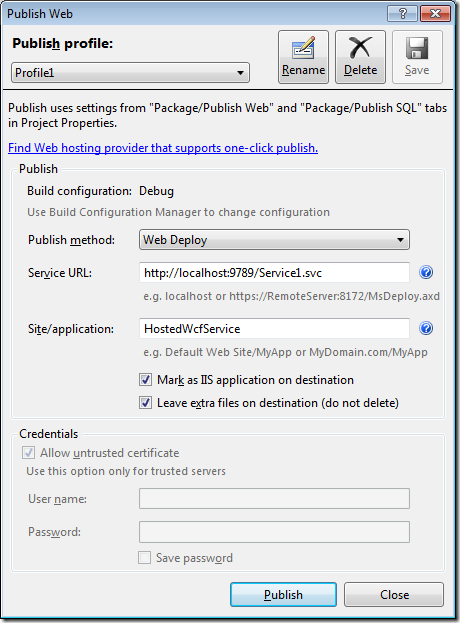
On clicking of publish a window will come.
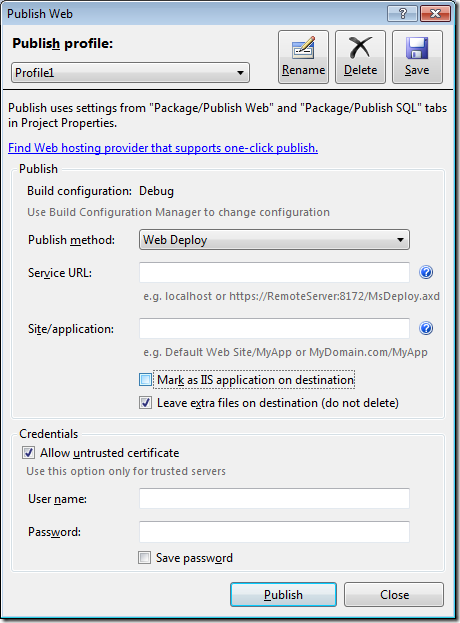
clip_image020

Give a Service URL. You are free to give any Service URL here. Just make sure host name is geeting resolved. In stead of localhost you can give IP address or your machine name also.

clip_image021

Give the name of the site HostedWcfService. We created this site in previous step.

clip_image022

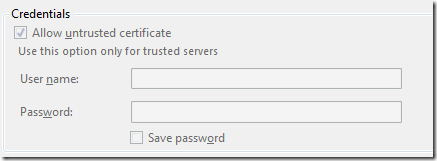
Leave the credential inactive.

clip_image023

Now click on Publish.

clip_image024

You will get the message in bottom publish succeeded

Browsing the service hosted in IIS

Open Inetmgr and right click on site HostedWcfService. Then from Manage Web Site select Browse option.
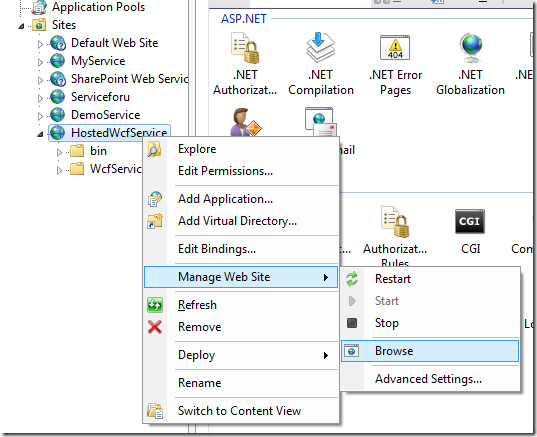
clip_image025

When you click on browse site will get open in browser
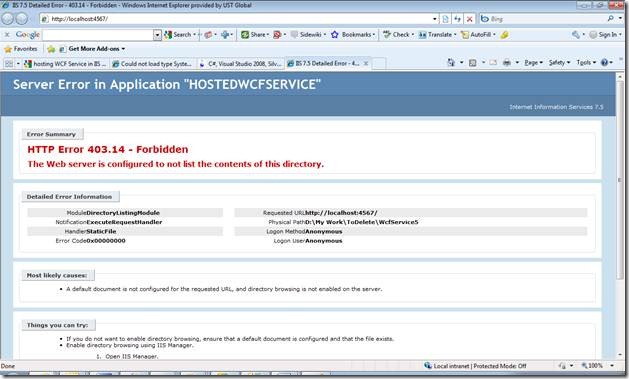
clip_image027

You will get the above error. Just in address bar append Service1.svc with the address to open the service in browser.

http://localhost:4567/Service1.svc

And in browser you will get the service up and running.
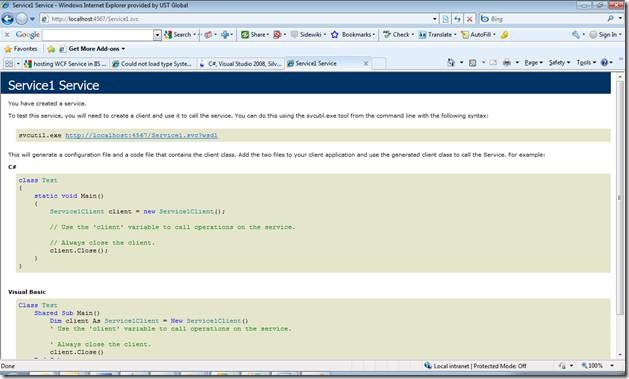
clip_image029

So now you successfully created and hosted the WCF 4.0 service in IIS 7.5

Testing the Service at client

a. Create console application project.
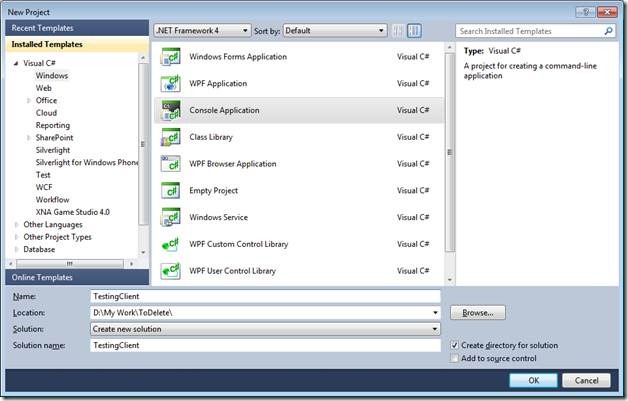
clip_image031

b. Right click and add the service reference.
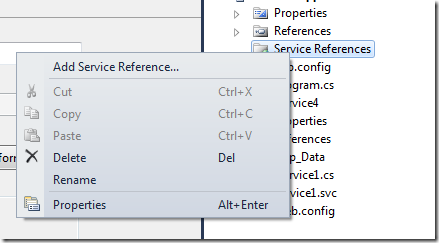
clip_image032

c. Give in address the address of service hosted in IIS and click GO.

clip_image033

d. Call the service as below ,

Program.cs

using System;
using System.Collections.Generic;
using System.Linq;
using System.Text;
using ConsoleApplication1.ServiceReference1;
 
namespace ConsoleApplication1
{
    class Program
    {
        static void Main(string[] args)
        {
            Service1Client proxy = new Service1Client();
            Console.WriteLine(proxy.GetMessage());
            Console.Read();
        }
    }
}
 

Output
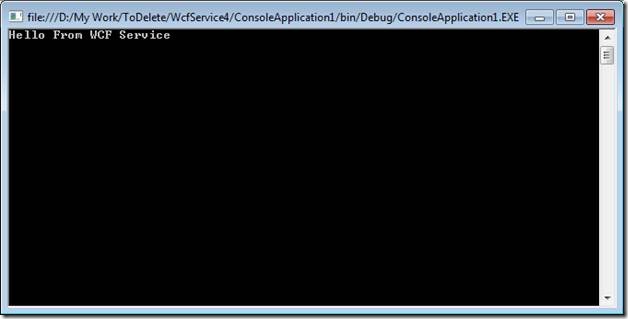
clip_image035

Conclusion

In this article we saw,

How to create a basic WCF 4.0 Service?

How to host WCF Service in IIS 7.5?

Hot to test service in a client.

I hope this article was useful. Thanks for reading. Happy coding.

what is difference between equals() and == operator

Both are used for comparison and boll returns the boolean value (true/false)

but in case a and b both are different datatype then also a.Equals(b) can be used to compare
but incase of == we cant event compaile the code if a and b are different data type


Example :
int a=0;
string b="o";

if(a.Equals(b))
{
//do some thing
}

//above code will compile successfully and internally the int b will convert to object type and compare

if(a==b)
{
//do some thing
}
//above code will give you the compilation error

2. by using == we cant compare two object
but Equals method will able to compare both the object internally

Wednesday, February 6, 2013

Delegate Controls in SharePoint 2010

SharePoint provides a mechanism that allows developers to customize out-of-the-box functionality in pages, without the need for modifying the pages that come with SharePoint. This mechanism is provided with delegate controls. I am going to show you how to create a delegate control that you can use to override the Global Navigation bar at the top of standard SharePoint pages.

Definition

First off, it’s important to understand what a delegate control is, so we can properly create and apply it in the specific situation we are developing for. A delegate control defines a region in an aspx page that allows the content to be replaced with our custom content. This custom content is created via a SharePoint feature, and when deployed and activated, replaces the standard content at runtime.

Development

The Global Navigation bar is located at the top of all the pages in a site, and the master page uses a delegate control in a placeholder to determine what to render at runtime. Here is the markup for the delegate control:

<SharePoint:DelegateControl runat=”server” ControlId=”GlobalNavigation”/>


Note that the ControlId value determines what delegate control is, so for our example the Global Navigation bar has a ControlId value of GlobalNavigation.

Once we know the name of the delegate control we are working with, we are ready to write code for our delegate control.

Open Visual Studio 2010 and create a new Empty SharePoint project. Map a folder to the CONTROLTEMPLATES directory in the SharePoint root (the 14 hive). Add a new SharePoint 2010 User Control by right-mouse clicking the CONTROLTEMPLATES mapped directory, from the Solution Explorer. Give the user control an appropriate name (I named it ucGlobNavDelegateControl). Once the control is created, open it in the Designer and add some markup:

Custom Delegate Control

You will also need to create an Elements.xml file, so add a module to the project, which will create the Elements.xml file as part of it (you can delete the Sample.txt file created).

Delete the markup between the Elements tags, and add the following markup:

<Control Id = “GlobalNavigation” Sequence=”90”
 ControlSrc=”~/_ControlTemplates/ucGlobNavDelegateControl.ascx” />


This markup associates the delegate control we are creating with the delegate control placeholder defined in the master pages in a SharePoint site collection. Note that the ControlId value equals GlobalNavigation, which specifies that our custom delegate control is overriding the Global Navigation control. The Sequence value must be less than 100, since SharePoint will render the control with the lowest sequence (the default control is set at 100). The ControlSrc value indicates the location to our custom delegate control.

Deployment

Deploying our custom delegate control is done using a feature, so create a feature in Visual Studio and name it MyCustomGlobalNavigationFeature. Add the module you created to it, and set the feature scope to Web. Compile and deploy the project to your SharePoint site.

Once your feature is deployed successfully, you should be able to verify that your feature has been deployed and activated in your site by managing the Site Features, under Site Settings. Look for your deployed feature, as shown here:

Activating Feature

If your feature is properly activated, you should now see the Global Navigation replaced by your custom delegate control:

SharePoint Page with Custom Delegate Control

Conclusion

And that’s all there is to it! Of course, the example here is basic, so there is a lot more that can be done with delegate controls. I am also including a screenshot of my Solution Explorer in Visual Studio, so you can get an idea of how my example project was structured:

Solution Explorer

Enjoy!