Promote two fields to a single SharePoint or Database column/field.
This article demonstrates how to configure an InfoPath form to display an optional text box for the user to enter a custom value if not available from the list of options. A separate field in the main data source of the InfoPath form will be used to store the value of the selected option, or the custom value if supplied by the user. Rules are set up to set the value of the separate field in the data source when an option is selected or when a custom value is entered into the text box. When submitting the form, the text field with either the value selected, or the optional text input entered if the user selects other can be promoted to a single SharePoint column, or database table instead of promoting both the option field and the text field containing the "Other" value if selected.
Conditional formatting is also used to hide the text box until the user selects "Other" from the list of options.
Process:
Set up the Initial InfoPath Form
1. Design a new form template using InfoPath 2003 or 2007
2. From the Task Pane (CTRL+F1), open the Controls toolbar
3. Double click, or drag an Option Button control onto the default view of the form template. Enter the number of options required (remember to add an additional option for "Other").
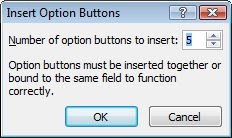
> Note: In this example, the Option Button will have 5 options including "Other". The name of this field in the Main Data Source will be "Options"
4. Right Click the first Option and select "Option Button Properties..."
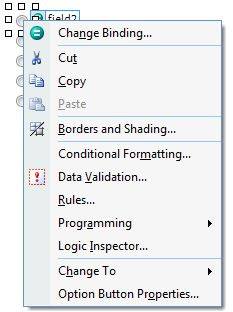
5. Enter a Field Name for the field. Note: You only need to set the field name on one of the options for it to be applied to all.
6. Enter the value which will be used when this option is selected for the "Value when selected".
7. Press Ok
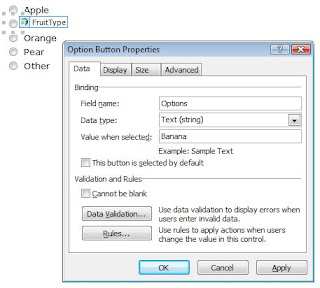
8. Repeat Step 6 for each option. Enter "Other" as the value when selected for the final option.
9. Add a text field control to the form template (main data source) for a user to enter a custom value if required.
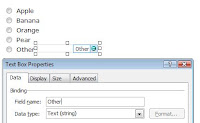
Note: In this example this field will be called "Other".
10. Add a separate text field to the form's Data Source only to store the selected value, or the value from the "Other" field by selecting "Add..." from the menu after right clicking the "myFields" group.
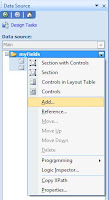
Note: For the purpose of this article, this field will be called "OptionSelected". This field does not need to be added to the form template. This field will contain the selected value from either the "Options" field or the custom value from the "Other" text field if required, and is explained further in the article.
Add Conditional Formatting to hide the "Other" text field when it is not required
11. Right Click on the "Other" text field control on the form template.
12. Select Conditional Formatting...
13. Press the "Add..." button to add a condition
14. Select the "Options" field created in step 3, "is not equal to" for the condition, and a text value of "Other" to test against (Select "Type text..." from the options).

15. Tick the "Hide this control" option for the formatting to be applied.
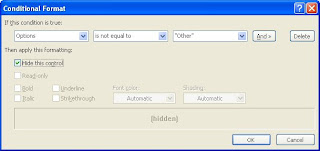
The "Other" text field will now only be visible when the user selects the "Other" option radio button.
No comments:
Post a Comment